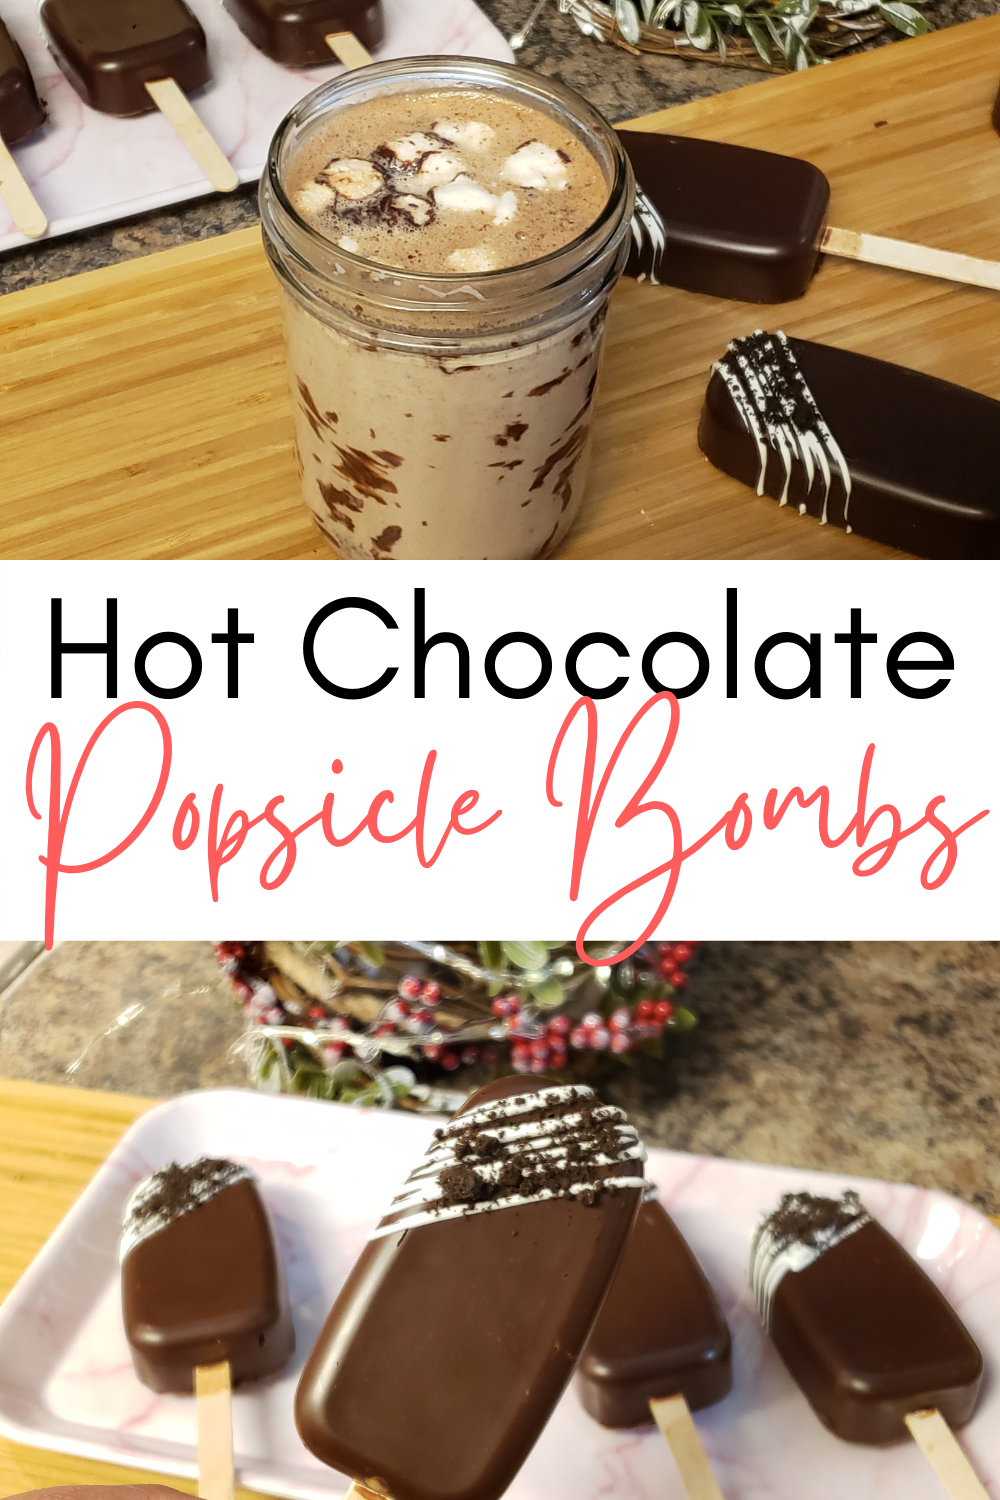
Hot Chocolate Popsicle Bombs
This blog post contains affiliate links which earns me a small commission for items my readers purchase from the list.
If hot chocolate bombs and hot chocolate sticks have babies, they’ll have hot chocolate popsicles! Just like the bombs, these popsicles are filled with cocoa mix and marshmallows. At the same time, much like the hot chocolate sticks, these popsicles melt when swirled in warm milk. A match made in chocolate heaven!

It is common to see recipes using chocolate melts (aka compound chocolate) to create the shell, however, in my opinion, the chocolate melts taste waxy. The melts often don’t require tempering making it a more popular choice. If you’re like me who likes sipping on a good quality hot cocoa, I highly recommend using “real” chocolate, one with cocoa butter. Unfortunately, once melted, real chocolate requires tempering to harden with a shine and snap. It can be intimidating but a really good skill to have. Once you’ve mastered tempering, the confections you can make are endless.
Watch the video below to see the recipe…
Equipment
Thermometer (must-have) or use a spatula with a built-in thermometer
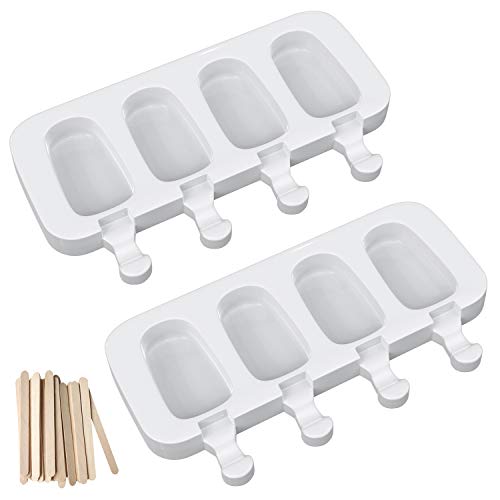
Silicone popsicle mold
Parchment paper of silicone mat
Glass or metal bowl
Spatula
Small offset spatula or scraper
Spoon or brush (optional)

Ingredients
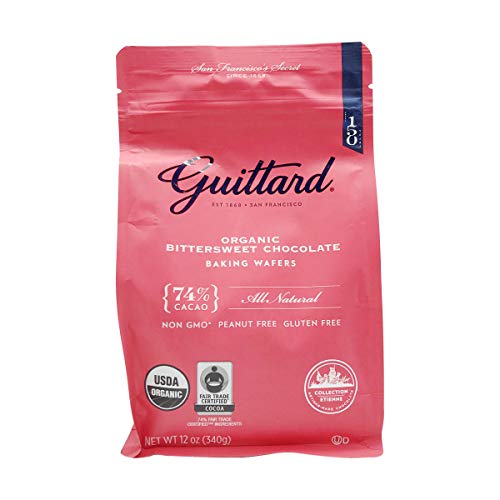
1 lb Chocolate (I use Guittard’s semi-sweet chocolate from the bulk section of Winco; you can also use a good quality chocolate bar as long as it has cocoa butter content)
Hot cocoa mix
Instant coffee
Powder creamer
Mini marshmallows
White chocolate melt
Cookie crumbs and cocoa nibs for decorations


Here are some pro-tips…
Yes, tempering without a thermometer is possible, however, save yourself potential headaches by using a good quality thermometer. I’m using a spatula with a built-in thermometer and it made tempering so much easier.
Be cautious of the temperature. Try to keep the temperature of the chocolate below 95°F, otherwise, use the seeding method to temper if it goes over. At below 95°F, the chocolate doesn’t go out of temper which retains its snap and shine once hard.
Chocolate seizes with water so make sure everything is dry.
Prepare everything you need first before tempering. Chop the chocolate, dry the equipment and set up your work station.
If the chocolate starts to harden making it hard to work with, simply place it back in the double boiler or microwave for 15 seconds.
Test out if the chocolate is properly tempered before coating by placing a small amount into a parchment paper. Place the parchment paper in the freezer for 3 minutes. It’s tempered if shiny and makes a snapping sound when broken.

Step 1 Tempering the chocolate…
Tempering chocolate simply means heating and cooling the chocolate to a workable consistency which, once cooled, hardens with a snap and a shiny gloss. Chocolate when melted without tempering remains soft. So to be able to create confections with a hard chocolate coating, tempering is necessary. Typically, about a third of the weight of the chocolate is saved (not melted) to add as a “seed” to the melted chocolate. The molecules of the seed help the molecules of the melted chocolate to get back to a tempered structure.
The easiest method I found in my research so far is from Guittard where the chocolate is melted at a certain temperature without necessarily coming off its temper. As long as the chocolate temperature stays below 95°F, the melted chocolate does not need seeds to temper.
The Easiest Method to Temper Chocolate: Double Boiler
Chop the chocolate into smaller pieces. This helps the chocolate to melt faster and prevents them from overheating.
Place the chocolate chunks in either a glass or metal bowl.
Heat the chocolate in a double boiler making sure that the bottom of the bowl does not touch the water. Keep the heat on low, do not boil. Turn off the water and allow the heat of the steam to slowly melt the chocolate. If needed, occasionally turn on the heat to help melt the chocolate.
Stir the chocolate in a gentle sweeping motion with a rubber spatula.
When 2/3 of the chocolate is melted, take off the heat and wipe the bottom of the bowl with a towel. Take caution making sure that the water does not get in contact with the chocolate. Also, keep track of the temperature making sure it does not exceed 95°F. Even if less than 2/3 of the chocolate is melted, take it off the pot if the temperature reaches 92°F. The bowl retails heat and will continue to heat the chocolate.
Keep stirring until all the lumps have melted. Scrape the sides and the bottom of the bowl occasionally. The best workable temperature is between 89°F and 92°F.
Test out the chocolate by placing a thin layer in a small piece of parchment paper and place it in the freezer for 3 minutes. If tempered right, the chocolate should come off the parchment paper easily, looks glossy and snaps when broken.
Pour the melted chocolate into a pastry bag.
What if I overheated the chocolate? Use the Seeding Method.
Place 2/3 of the chocolate in the double boiler and melt to 115°F.
Add the remaining 1/3 of the chocolate and stir until all the lumps have melted and at 87°F.
Emulsify by stirring and scraping the sides making sure that the cocoa butter is fully mixed in.
Test out if properly tempered before using.


Step 2 Making the popsicle shells…
Prior to filling the popsicle molds, make sure that they are completely dry. Water seizes chocolate and you will end up with a weird lumpy shell. Also, I prefer to use a pastry bag to pour the chocolate into the molds because it is easier to control and less messy. If you don’t have a pastry bag, you can use a ziplock bag or a spoon to pour in the chocolate.
Place about 2 to 3 tablespoons of tempered chocolate into the molds. Anything more creates a thicker shell which takes longer to dissolve in warm milk. Plus, the more chocolate the sweeter the hot cocoa drink will be. I prefer a thin shell that is sturdy enough to hold the filling.
Use a brush or the back of the spoon to coat the molds. Start with the sides, ensuring that all surface is covered with chocolate. Then, even out the bottom surface. (Watch the video here to see how to coat the mold with a spoon. )
Insert the popsicle stick right after coating the mold before the shell hardens. It will likely cause a crack if you insert the stick once it hardens.
Add a small dollop of chocolate on top of the stick to help it stay in place.
Repeat until all molds are coated and stick inserted.
Place in the freezer for 3 minutes to harden.

Step 3 Fill the popsicle shells…
For hot chocolate, add 1 tablespoon of hot cocoa mix and mini marshmallows.
For mocha, add 1 tablespoon of each of the instant coffee and creamer then top with marshmallows.
Do not overfill. Try not to exceed the height of the mold to achieve a flat surface.
With the remaining chocolate, coat the top starting on the sides. Seal the popsicle by completely covering the top with chocolate.
Using either a scraper or a small offset spatula, clean out the edges of each mold. Also, take out any excess chocolate.
Freeze the molds for 3 minutes to harden.
Carefully take each hot chocolate popsicle out of the mold by holding the stick and carefully peeling it off from the mold. If the chocolate is tempered properly, it should come off easily. Avoid touching the chocolate shells to maintain a glossy and smooth surface.


Step 4 Decorate hot chocolate popsicles…
To decorate, microwave white chocolate melts for 30 seconds and add additional 15 seconds until it’s melted.
Place the melts in a sandwich bag and snip the corner. You can use oil-based food coloring to add colors to your melts.
Drizzle the white chocolate melts into the chocolate popsicles in different patterns depending on the flavor.
Sprinkle. I used crushed Oreos and cocoa nibs.

Step 5 Swirl in warm milk…
Heat up between 10 oz and 15 oz of milk depending on how rich you want your hot chocolate to be. I personally like 13 oz. of milk for this size of a popsicle.
Pour “hot” milk into the cup. Make sure that the cup is only 2/3 full to allow room to swirl the hot chocolate popsicle. Hotter milk helps the chocolate to melt and mix faster.
Swirl the hot chocolate popsicle and watch it melt.
Stir evenly.
Enjoy!

How cute are these popsicles?! They are also really fun to make! Once you get the hang of tempering, imagine the countless other things you can create! If you happen to make any, tag me @sweetsavorygrace ! Cheers!